How to Convert a Synology SHR‑1 to SHR‑0 (Single-Disk) Using mdadm
If you have a Synology SHR‑1 storage pool “with data protection” and the second disk has already been deactivated, you may notice the RAID still shows as degraded. Currently it isn’t possible in the Storage Manager UI to convert back to a single disk “without data protection”.

These steps will help you safely update the RAID metadata so the array is recognised as a proper single-disk SHR‑0 volume, cleaning up the ghost “removed” disk entry and restoring the array to a healthy state for the remaining disk. All your data will remain intact. After this process, the array will be “without data protection” because it is a single-disk volume.
⚠️ Important Warnings
- This procedure removes redundancy. If the remaining disk fails, your data is lost.
- Always back up your data before making changes to RAID or SHR volumes.
- This method is for advanced users comfortable with SSH and command-line operations on Synology.
Step 1: Check the Current SHR-1 Status
SSH into your Synology NAS:
ssh admin@DiskStation
List the RAIDs:
admin@DiskStation:~$ cat /proc/mdstat
Personalities : [raid1]
md2 : active raid1 sda5[0]
      7803291520 blocks super 1.2 [2/1] [U_]

md4 : active raid1 sdb5[0]
      13661650816 blocks super 1.2 [1/1] [U]

md1 : active raid1 sdb2[0] sda2[1]
      2097088 blocks [2/2] [UU]

md0 : active raid1 sdb1[0] sda1[1]
      2490176 blocks [2/2] [UU]

unused devices: <none>
The [2/1] in the output is how we know it is md2 that is the one we need to work on, get more detail on it:
sudo mdadm --detail /dev/md2
Example output for a 2-disk SHR-1 where one disk has been deactivated and removed:
Raid Devices : 2
Total Devices : 1
Active Devices : 1
State : clean, degraded
Number   Major   Minor   RaidDevice State
0        8        5        0      active sync   /dev/sda5
-        0        0        1      removed
Notice:
Raid Devices= 2 (expected for RAID-1)Total Devices= 1 (only one disk physically present)- A
removedslot appears in the metadata
The array is technically degraded, but the remaining disk is healthy.
Step 2: Shrink the RAID Metadata
To convert the array to a proper single-disk RAID (SHR-0 equivalent), use mdadm with the --grow option. Because a 1-disk RAID-1 is unusual, you’ll need --force.
sudo mdadm --grow /dev/md2 --raid-devices=1 --force
What this does:
- Updates the RAID metadata to officially have 1 RAID device
- Removes the “removed” disk placeholder
- Keeps all your data intact
- Marks the remaining disk as healthy and the array as without data protection
Step 3: Verify the Changes
After running the command, check the status again:
sudo mdadm --detail /dev/md2
Expected output:
Raid Devices : 1
Total Devices : 1
Active Devices : 1
State : clean, degraded
Number   Major   Minor   RaidDevice State
0        8        5        0      active sync   /dev/sda5
No removed slot remains. Your array now behaves as a single-disk SHR volume.
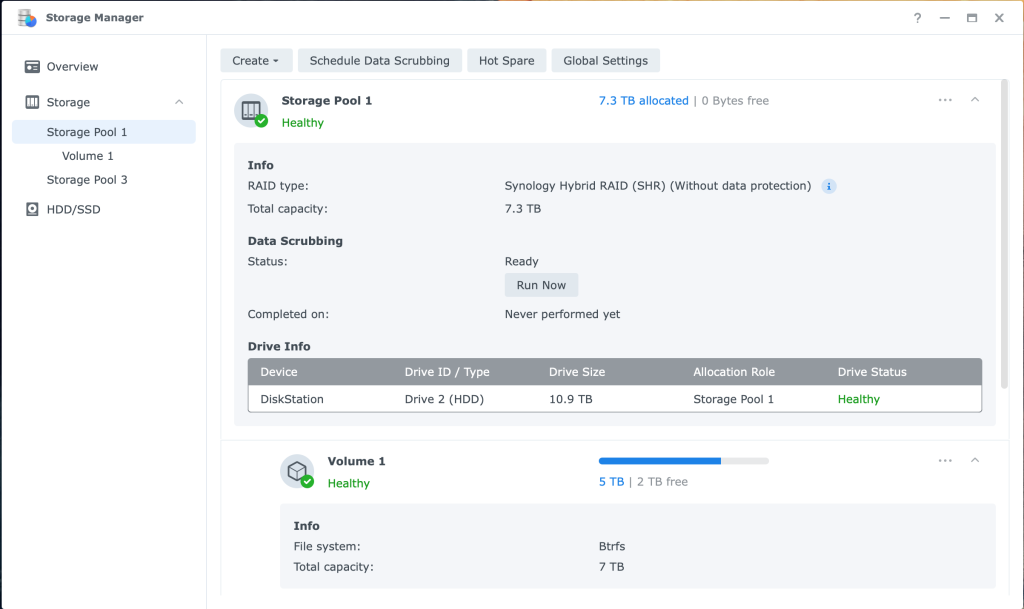
Step 4: Verify via DSM
Open Storage Manager in Synology DSM:
- Check that the storage pool and volume is healthy and shows the expected size.
- DSM still labels it internally as RAID-1, but it is now “without data protection”.
- You now have a single-disk volume ready to expand or continue using.
✅ Summary
With these steps, you can:
- Remove the ghost “removed” disk from a 2-disk SHR-1 array
- Convert it to a single-disk SHR‑0 equivalent
- Keep all data intact
- Restore the array to healthy status
Key points:
- Always backup first
- Only use
--forceif you are sure about the remaining disk - This approach works specifically when the array is clean, degraded, and the second disk has already been removed
This method provides a safe, low-risk way to simplify a Synology SHR-1 mirror when you no longer need redundancy — all while preserving your data.